 |
| Pumpkin Vase http://partypatisserie.com/wp-content/uploads/2011/10/Halloween-21_Watermark.jpg |
Pumpkin carving
has been an American tradition for many years. This simple practice has evolved
into a ‘Martha Stewart’ phenomenon. The simple pumpkin has now become a fall
centerpiece for fall/Halloween social functions (i.e. parties, dinners,
trick-or-treating). This festive idea captures the uses of a pumpkin as a vase
for tissue paper flowers. Creating one of these crafts is a fun and easy way to
spice up your fall season.
To start off
your project you will need a few simple objects such as: a medium sized Styrofoam block, tissue paper (the
more the merrier), scissors, floral wire or chenille pipe cleaners, green
tissue paper or the leaves, hot glue and gun, serrated knife, shiny rhinestones,
spoon, black Spray Paint.
Beginning this project start with carving the
main object: a medium sized pumpkin. Use a serrated knife to cut a medium-sized
round hole into a medium sized pumpkin around the stem of the pumpkin; you
should then be able to pull the stem and the round piece will come off. The
inside will be used to hold the Styrofoam to stabilize the tissue paper
flowers. Scoop out all of the innards with a spoon to get rid of all the guts
and then place the seeds on a separate sheet (you may want to eat these later
for a snack?). Use black spray paint to paint the pumpkin and make sure the
paint is evenly sprayed to get an even finish. Place shiny rhinestone beads on
the whole of the pumpkin up and down the pumpkin with a hot glue gun; any shiny
glamorous rhinestone beads will do.
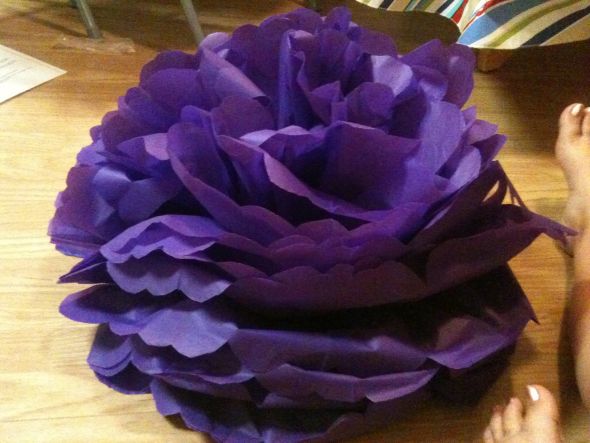
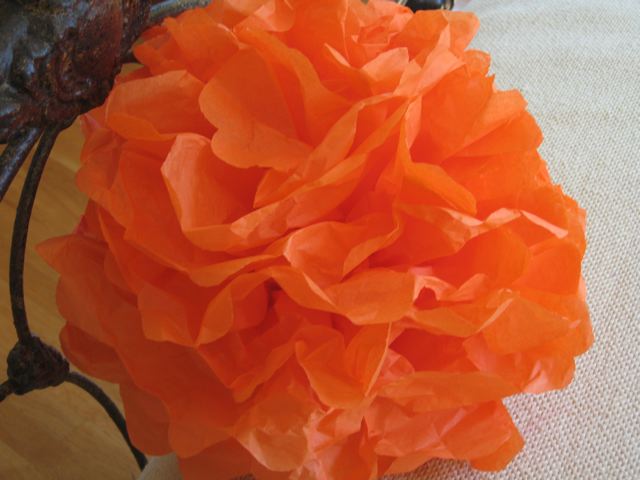
The tissue
paper flowers will make great accents for creating a beautiful centerpiece using
seasonal accents. To start making the accents for the pumpkin, take about ten
(or however many you want depending on how fluffy you want the flower to be)
sheets of any colored tissue paper and lay them down all together, make sure
they are matching, and start folding them “hot-dog” style back and forth—like
an accordion about one inch thick. Wrap floral wire or chenille pipe cleaner
around the center of the folded sheets. For a more flowered look you can design
the edges of the tissue paper by snipping them off with your hand or ripping
them off for an even FLUFFIER look. Then once all done gently unfold the tissue
paper into its different sections and try to arrange them in a pretty way you
think best.
Accenting the
flowers can be done by simply making about six of these in lots of different
pretty fall colors and sizes (three big and three small)! Take about four
pieces of green tissue paper, lay them down all together and cut them into four
different sections. Take one of the four sections and hot glue one of the
bottom corners and quickly, without burning your fingers, start twirling the
tissue paper around the hot glue; they should stay nice and tight. Do the same
process for the rest of the four pieces and when done place them on different
stems of the flowers. Have several extra leaves to put between flowers to break
up any color clashing and place around the opening of the pumpkin and repeat if
you want a more full-leafed effect.
 |
| Black Pumpkin with Rhinestones http://farm7.static.flickr.com/6179/6191774556_b563ae3db4.jpg |
 |
| Purple Tissue Paper Flower http://bios.weddingbee.com/pics/151530/purple_flower.JPG |
 |
Orange Tissue Paper Flower
http://studiopk.files.wordpress.com/2007/09/flower.jpg |
 |
| Tissue Paper Leaves http://www.craftjr.com/wp-content/uploads/2009/04/tissue-paper-topiary-leaves.jpg |
Flower
arranging is a very detailed process that should be fun and creative. To start,
place the Styrofoam block into the carved out pumpkin with an inch to two
inches sticking out of the top (this will help stabilize the flowers). Stick
the leaves into the Styrofoam around the opening of the pumpkin to give a
fuller overall look (you can decide how many is needed based on your taste).
Take the previously made flowers
and make sure you can put them at different heights to create a fuller look
(have longer stems to allow room for error). One of the flowers should be the
center flower to base the placement of the other remaining flowers. Place the
subsequent flowers at a slightly shorter length than the center flower to
create a rounded overall shape around the center flower. For the final look you
should not be able to see the Styrofoam; however, if there are open spaces for
the Styrofoam to be seen, fill them with leaves or make extra flowers. The
tissue flowers may not have everything you need to create this full bouquet
look so add leaves to the stems of the flowers make some flowers big and some
small. Make sure the colors don’t clash—cool colors vs. warm colors. Cool
colors are green, blue, and purple and warm colors are red, orange, and yellow.
It is bad to put browns next to blacks (although most flowers don’t come in
these colors—tissue paper ones do!). Arrange them to your taste and then you
are done!!!
With
your pumpkin vase now complete now is the perfect time to entertain. Make sure
that when you create your pumpkin vase, to do so the day before your event.
This will ensure the pumpkin stays fresh and festive. Making crafts is a
delicacy of some peoples’ lives and by celebrating this pumpkin vase-making
project; we can only call upon the creative-craft-spirit of Martha Stewart
within ourselves.
|
| Pumpkin Vase http://partypatisserie.com/wp-content/uploads/2011/10/Halloween-21_Watermark.jpg |
By: April Opatik
No comments:
Post a Comment